Graphical Design – Workflow processes created using the RecFind 6 Workflow Designer
This type of workflow can be used when you require multiple tasks to be completed as part of a larger structured process.
When adding a new document or EDOC, the two important fields to complete are the Document Type and Delegate fields;
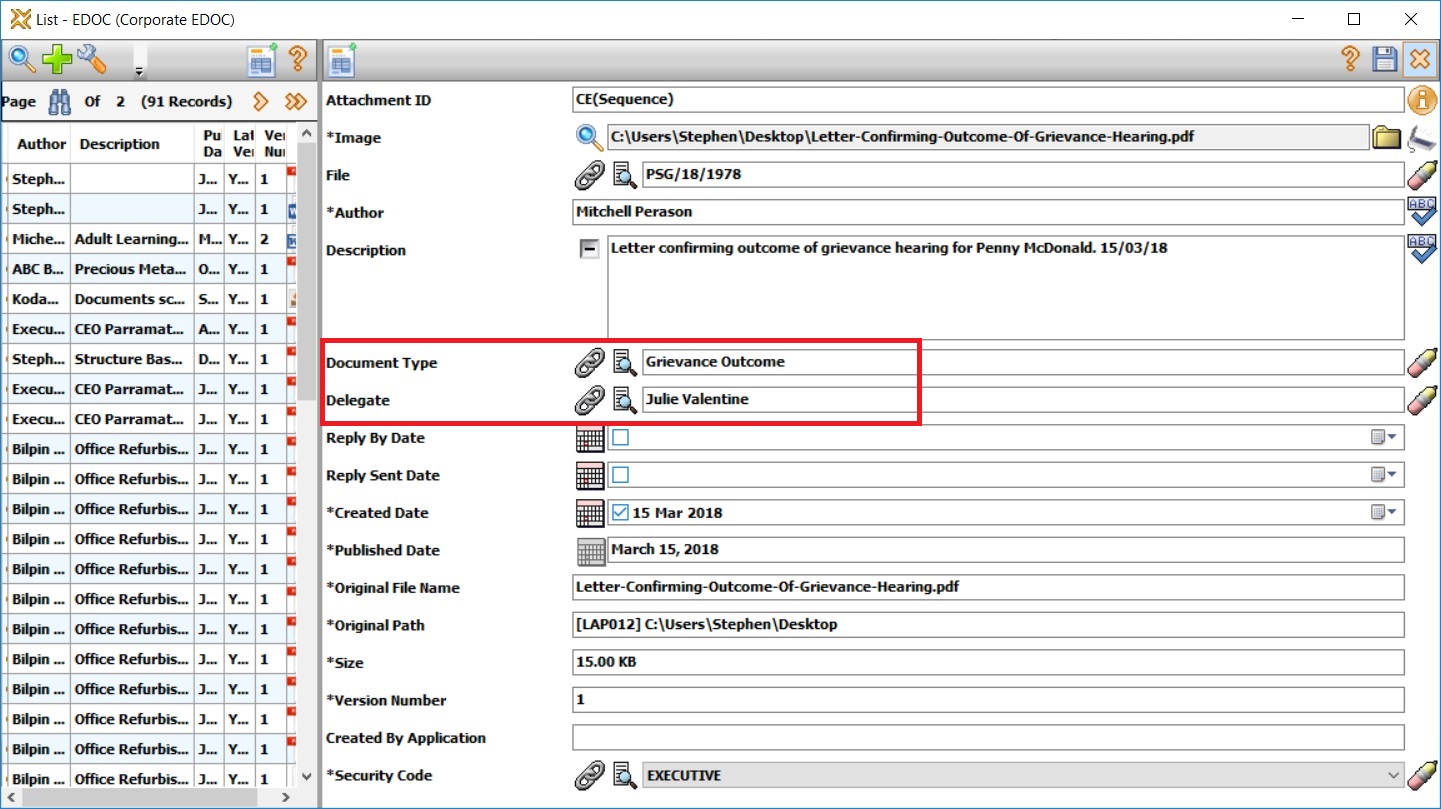
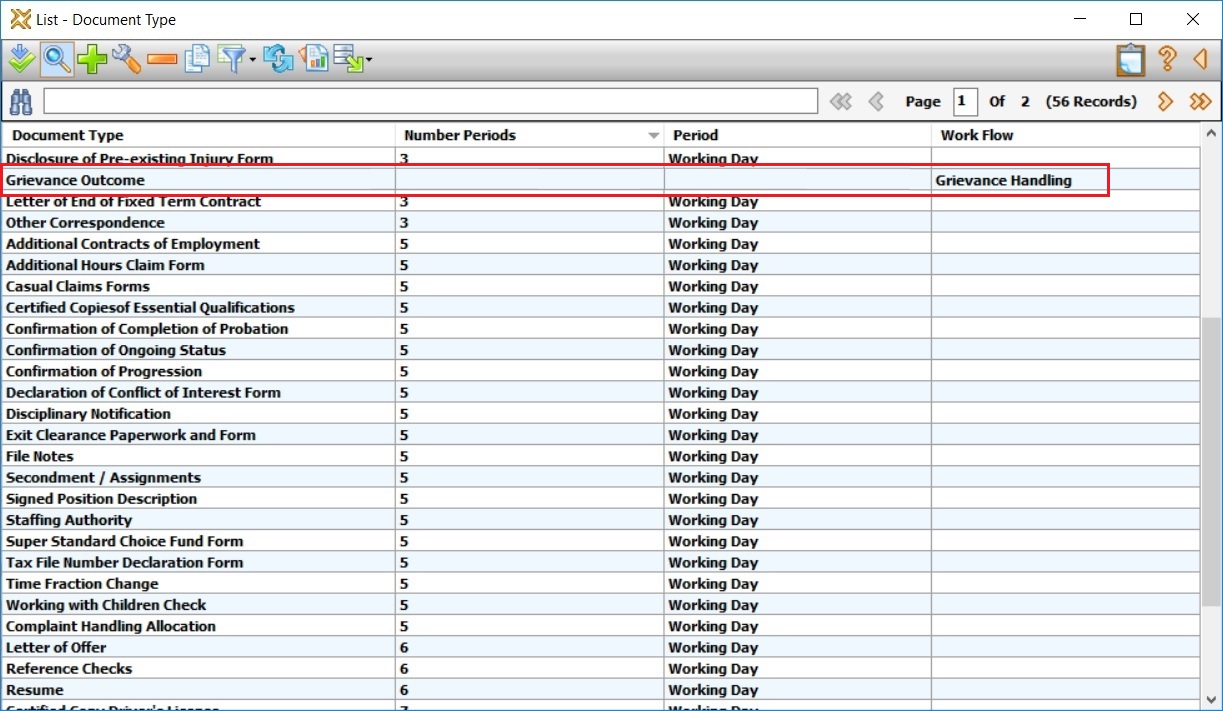
The Document Type field contains a link to the Document Type table. Document Type records are used to identify which workflow to initiate for this particular document or EDOC. For example, below we can see a ‘Grievance Outcome’ Document Type, which when assigned to a document or EDOC, initiates the Grievance workflow;
The Delegate field contains a link to the Person table. This record is used to identify the Person to whom the initial task in the workflow will be assigned. Alternatively, you can assign a default Delegate while creating the Workflow.
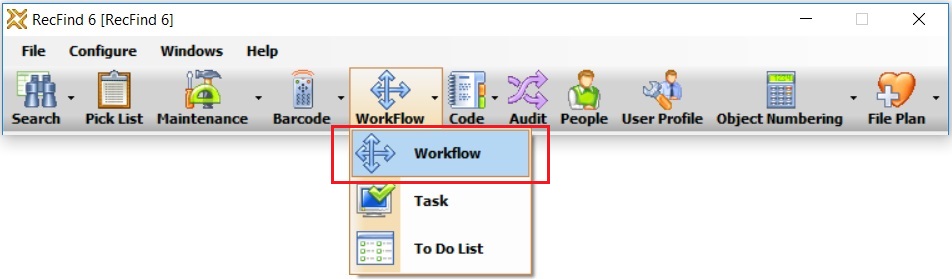
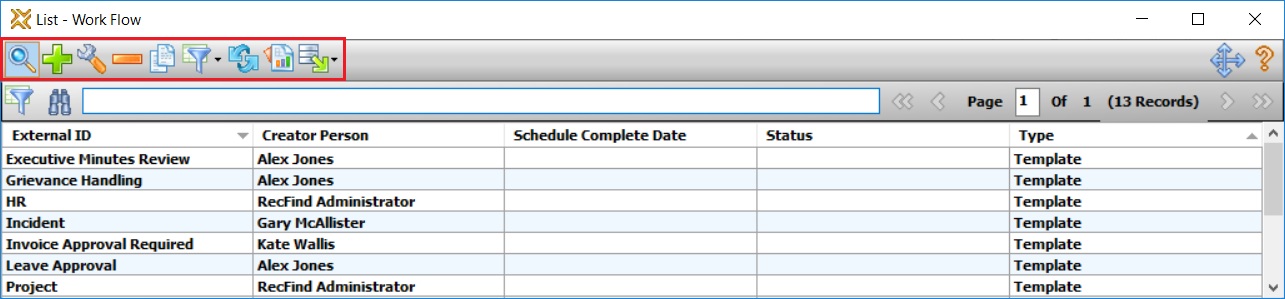
Workflows are created by selecting the Workflow option from the Workflow menu;
You can then Add a new Workflow, or modify an existing one from the Workflow list view;
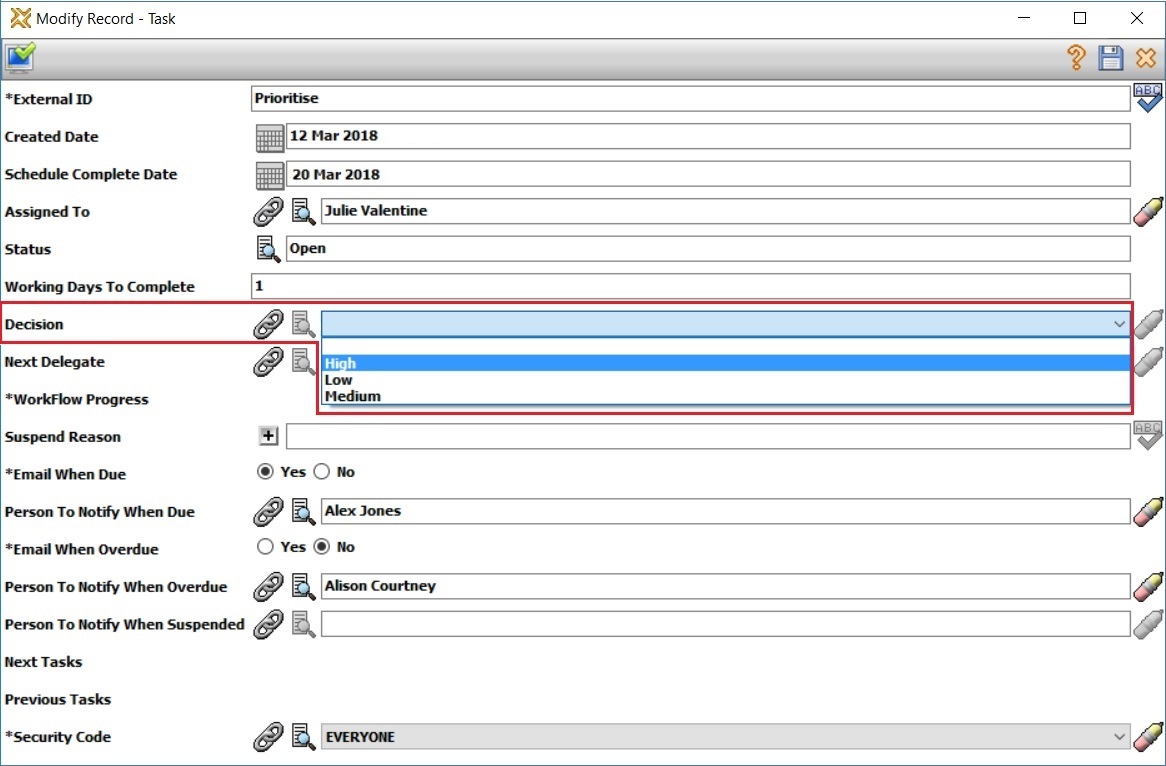
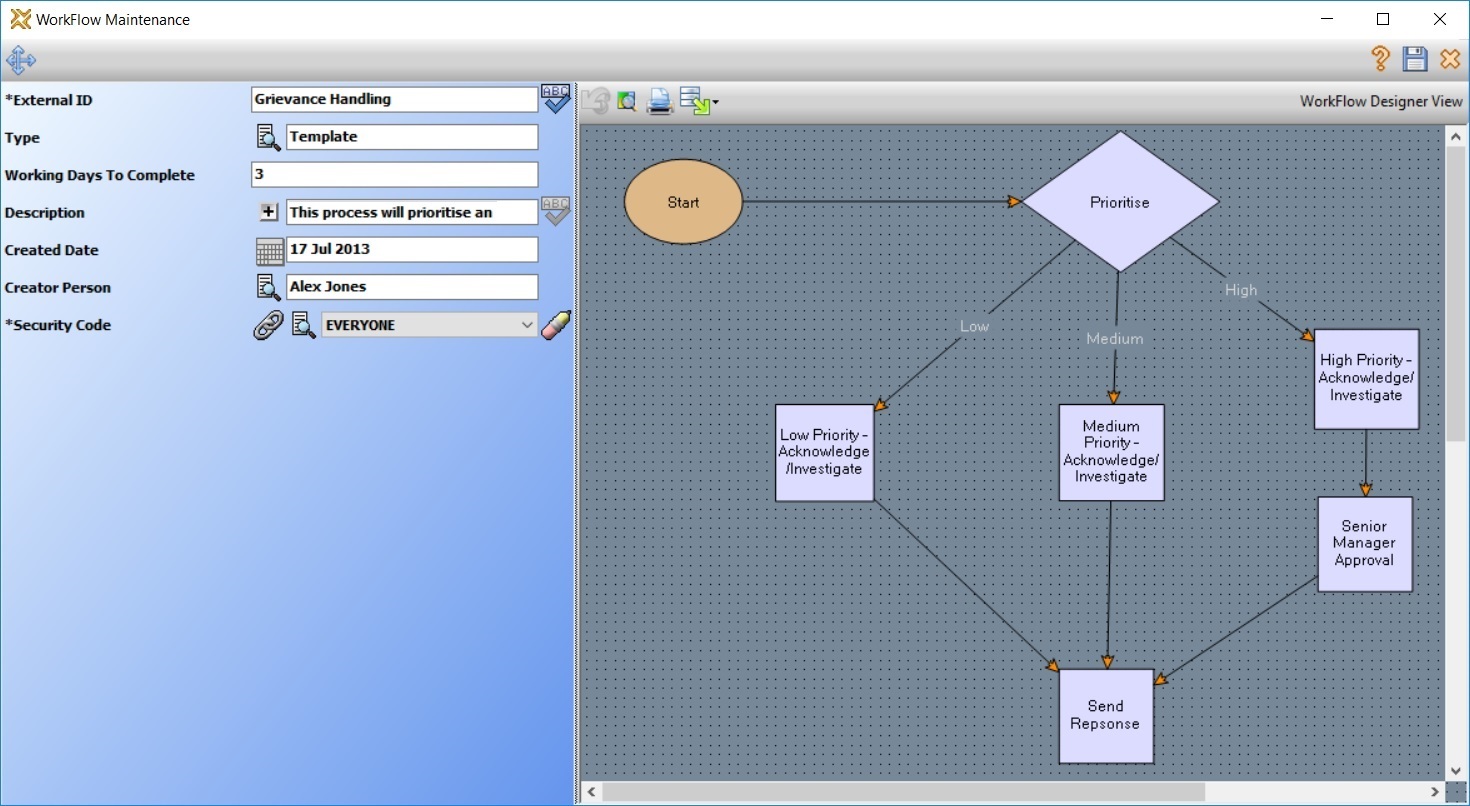
To Add a new Workflow, select the Add method and you will be presented with a blank palette in the Workflow Designer. From here you can add any information about the process as well as start to create the Workflow by adding individual tasks. You can create tasks by clicking and dragging from the Start task or the previous task;
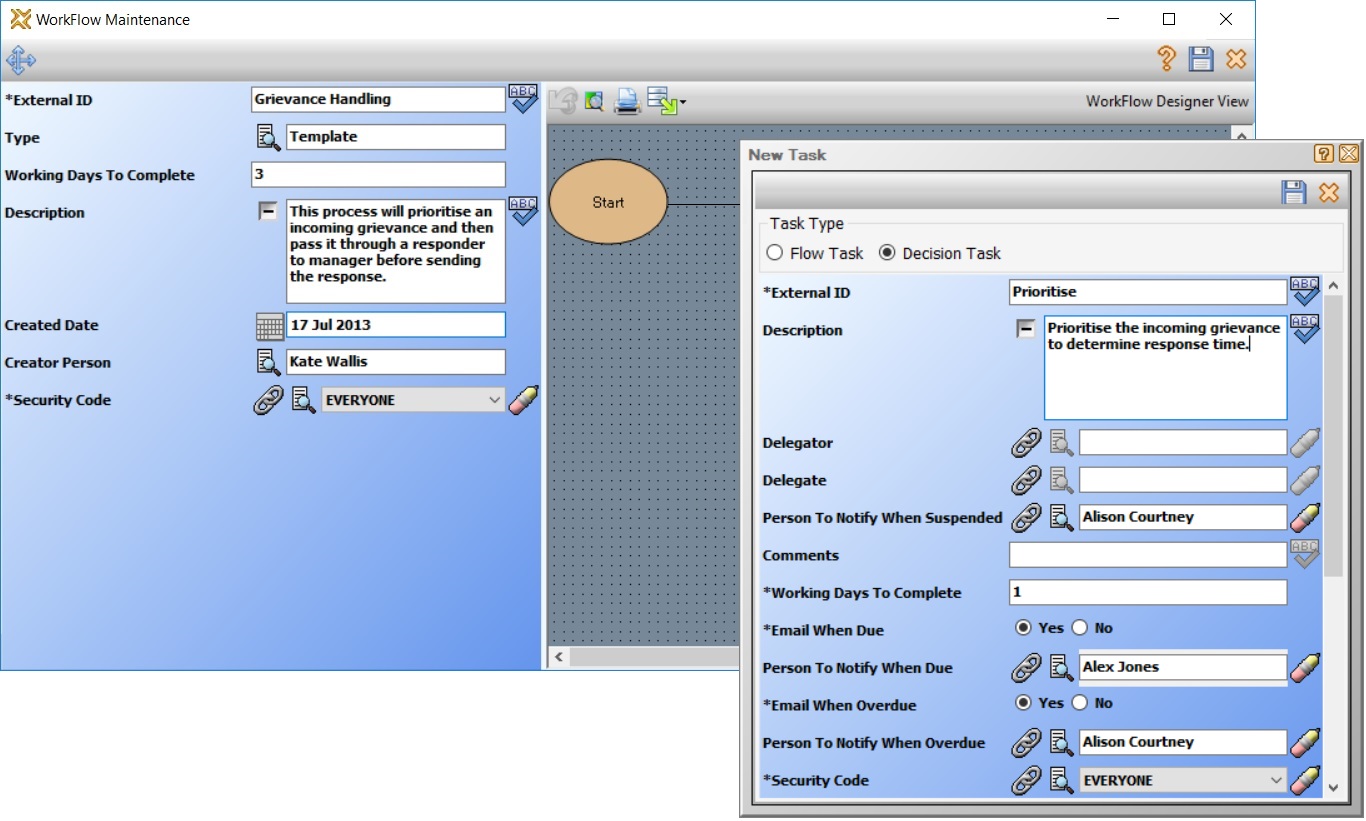
Continue adding and configuring tasks until you have completed your process;
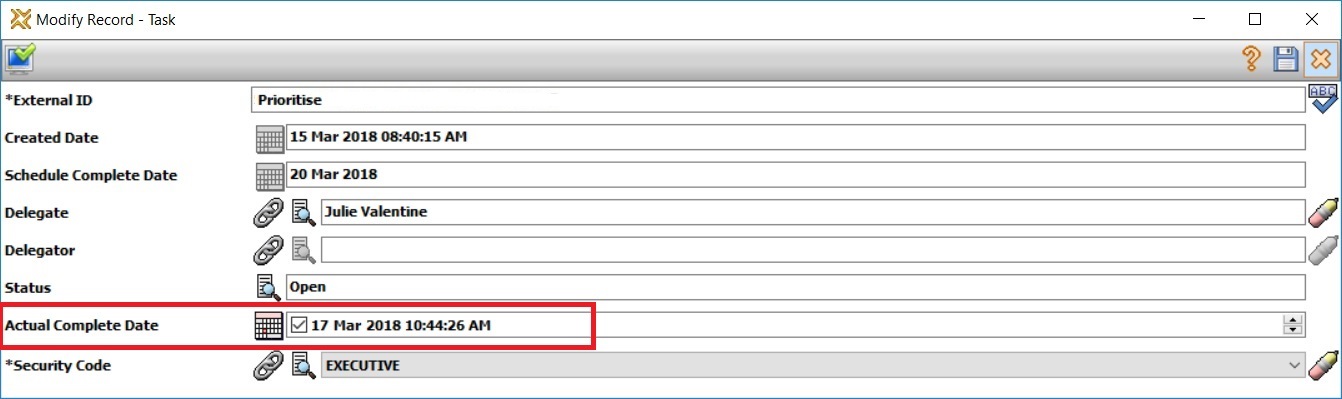
Once you have created your workflow, linked it to a document type, and then assigned it to a new record, the workflow will be initiated, and the first task will be allocated.
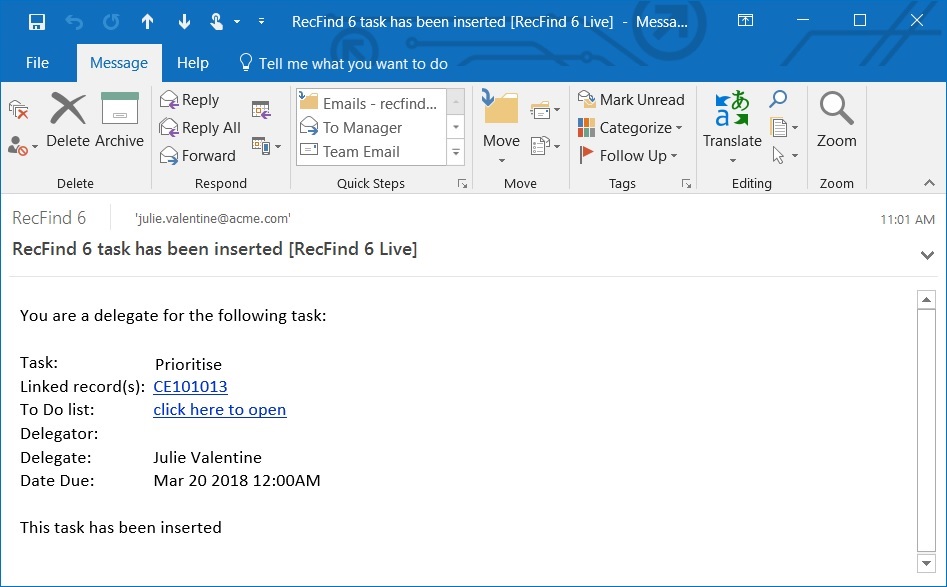
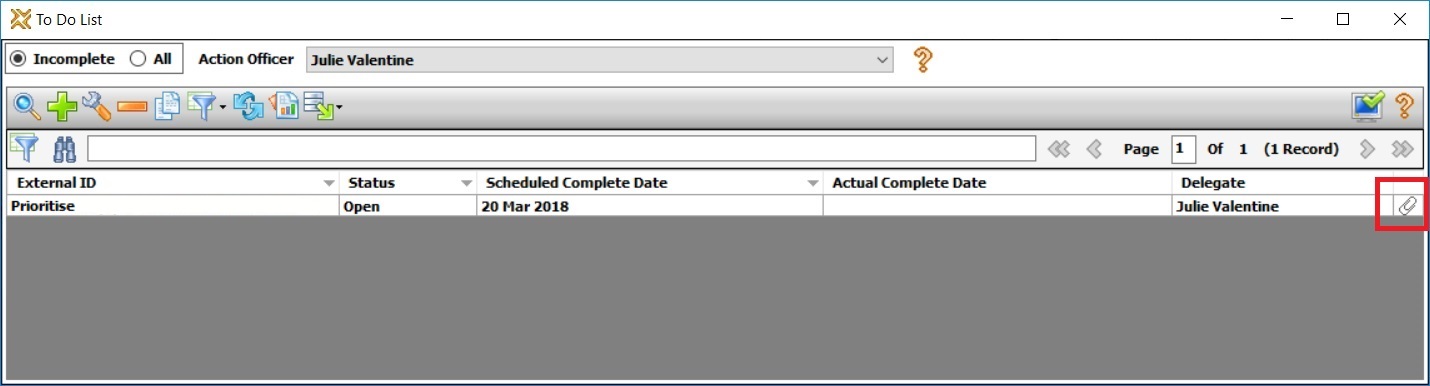
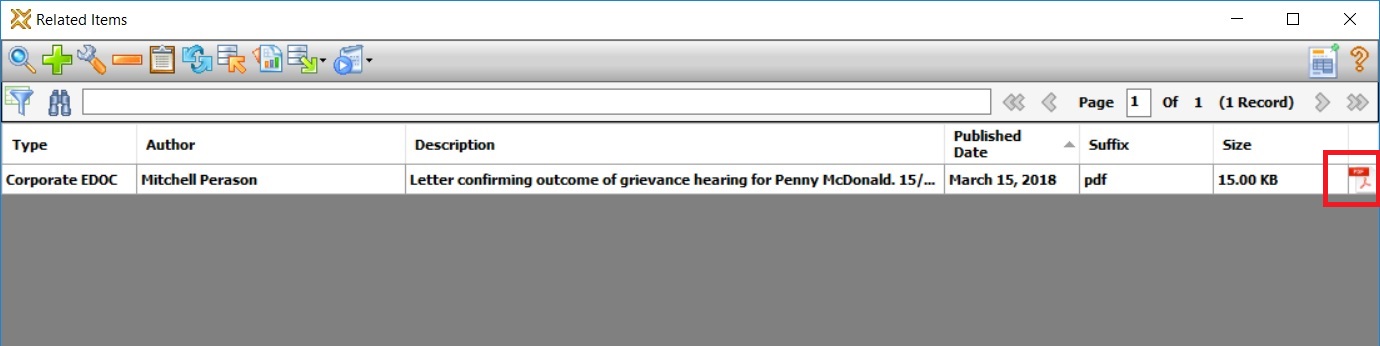
At this time, an email will be sent to the task Delegate advising them that they have a task in their To Do List. The email contains a link to the document or EDOC and a link to the Delegates To Do List;