Knowledgebase & FAQ |
Error: Unable to add attachments via RecQuery-TCSymptom When attempting to add an attachment or check-in an attachment, the system fails to add the attachment. No error message is received but the attachment list isn't updated to include the new attachment. Note: This article assumes that when using RecFind users are able to an add attachment successfully, the problem only occurs with RecQuery-TC. Cause The RecQuery-TC attachment function utilizes FTP to transfer files to and from the workstations. Incorrect configuration of the FTP settings is the most common cause of the attachment functions failing. This article discusses steps involved in confirming your configuration. Solution
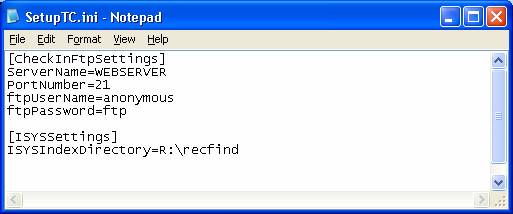
In the RecFind\RecQueryTC directory you will find a file called SETUPTC.INI, if not you will find the file in the RecFind directory or IIS server’s Windows\System32 directory. Load the SETUPTC.INI file in to Notepad.
The SETUPTC.INI file displays the settings that RecQuery-TC will use to connect to the FTP site.
To confirm the settings
in your SETUPTC.INI, from your web browser (i.e. Internet Explorer),
enter the following URL: substituting <ServerName>
and <PortNumber> with the values found in the SETUPTC.INI file, for
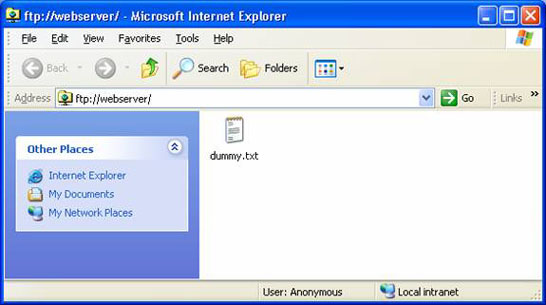
example using the above SETUPTC.INI you would enter the following: If you haven’t permitted anonymous access you may receive an error saying permission denied. If this is the case, right-click on the blank “page” within Internet Explorer and select “Login As…”. When prompted, enter the ftpUserName and ftpPassword as specified in the SETUPTC.INI file.
Note: the above screen does not show the port number of 21. This is caused by 21 been the standard port number for FTP. If it successfully connects, it confirms that the SETUPTC.INI file is correctly configured. If it doesn’t connect correctly, review your FTP site configuration. See section ‘Checking FTP site configuration’. If you haven't created the FTP site at all, please refer to the RecQuery-TC Installation Guide for instructions and update the SETUPTC.INI to reflect the correct settings.
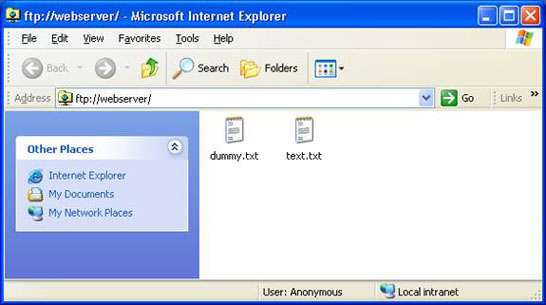
Next, attempt to save a file to the site. To do this, create a temporary text file on your desktop and then drag the icon from your desktop to the browser window. If successful the file will now appear as shown below. If you are unable to save the file to the ftp site it indicates that there is a problem with permissions. If using anonymous access, please confirm that the user assigned to the anonymous account has permissions to write to the FTP site. See section ‘Checking FTP site configuration’ for more information.
If all of the above works, it confirms that the file is reaching the web
server. Finally, check that the Windows Event Log (Application Log) for errors that occur at the same time you as attempting to add an attachment. If the error doesn’t clearly indicate a cause, please supply this information to Knowledgeone Corporation Support for analysis. Checking FTP site configuration
To confirm the port number, view the properties of the FTP site through IIS. On the ‘FTP Site’ tab the TCP port is displayed (see below), please ensure that it matches the PortNumber value in the SETUPTC.INI file. If not, alter your SETUPTC.INI file to be the correct value.
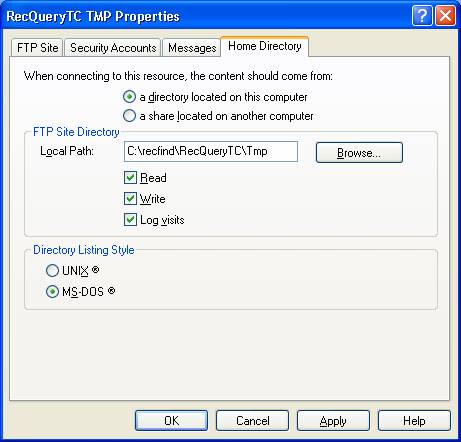
The FTP Site Directory must be the TMP directory of the RecQuery-TC directory. If your RecQuery-TC web site has a home directory of C:\RECFIND\RECQUERYTC then your FTP Site Directory must be C:\RECFIND\RECQUERYTC\TMP. Note: there is also a TMP sub-directory in the RecFind directory, this is not the correct location. It must be the TMP sub-directory in the RecQuery-TC directory. The FTP Site Directory is displayed on the ‘Home Directory’ tab of the FTP Site properties screen.
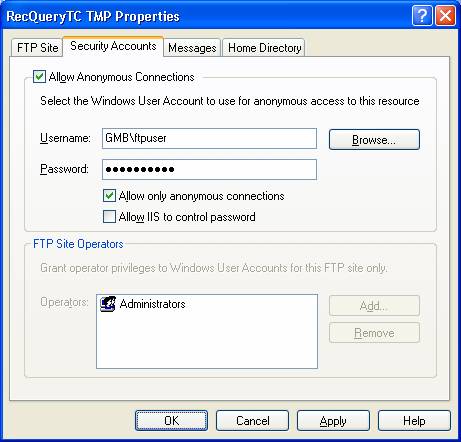
This section only applies if the ftpUsername in the SETUPTC.INI file is set to anonymous. If your FTP site is configured to allow anonymous connections, no password verification will occur and users will inherit the privileges of the user account defined on the ‘Security Accounts’ tab of your FTP site (see below).
In this example, users will connect as the account ‘ftpuser’ in the GMB domain. To ensure that this account exists and is valid, please use the ‘Browse…’ button located next to the Username to select the account. You will need to ensure that file permissions allow the ‘GMB\ftpuser’ account to write files to the directory specified as the FTP Site Directory, ie. the TMP sub-directory of the RecQuery-TC directory. HINT! As a test, set the Username to the system administrator. This will typically avoid any permission issues as the ‘administrator’ account has full access to all directories.
|